

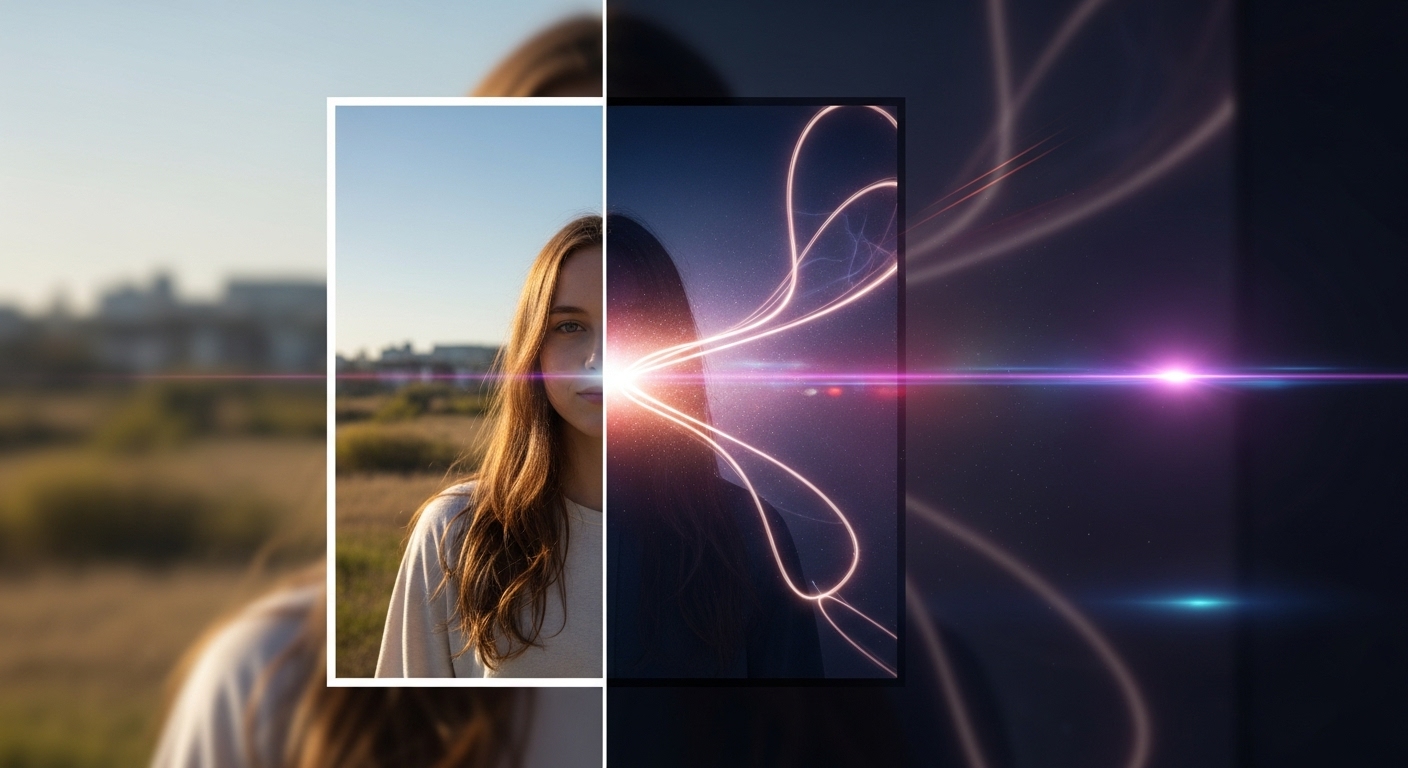
Turning ordinary photos into cinematic masterpieces has never been easier thanks to modern technology. With tools like Photoshop and AI-powered applications, you can transform a simple snapshot into a dramatic, movie-like image. Cinematic photos are characterized by rich colors, dynamic lighting, and a sense of depth, giving your visuals a professional and captivating look. In this guide, we will walk you through step-by-step methods to achieve cinematic effects using both Photoshop and AI apps.
Understanding Cinematic Style
Before editing, it’s important to understand what makes a photo “cinematic.” Key elements include:
- Lighting: Emphasize shadows and highlights to create depth and drama.
- Color Grading: Use color tones to evoke emotion—teal and orange, desaturated blues, or warm cinematic hues.
- Composition: Strong framing and perspective create a storytelling effect.
- Focus and Blur: Selective focus, bokeh, or depth-of-field effects enhance cinematic feel.
Method 1: Using Photoshop to Create Cinematic Photos
Photoshop offers powerful tools for detailed and professional cinematic effects:
- Step 1: Adjust Exposure and Contrast. Use Curves or Levels to create dynamic lighting and enhance shadows and highlights.
- Step 2: Apply Color Grading. Use Gradient Maps, Color Balance, or LUTs (Look-Up Tables) to achieve cinematic tones.
- Step 3: Enhance Depth with Blur. Apply Gaussian Blur or Lens Blur selectively to background elements to create depth-of-field.
- Step 4: Add Vignettes. Slightly darken edges of the photo to draw attention to the center and add drama.
- Step 5: Sharpen Key Details. Enhance important elements like faces or objects to make them pop.
- Step 6: Optional Effects. Add film grain, light flares, or cinematic overlays for a polished, movie-like look.
Method 2: Using AI Applications
AI tools can quickly generate cinematic effects with minimal effort:
- Step 1: Choose an AI Image Enhancer or Generator. Popular apps include Remini AI, Photoleap AI, or Lensa AI.
- Step 2: Upload Your Photo. Make sure the original image is high resolution for best results.
- Step 3: Select a Cinematic Filter or Style. Many AI apps have preset cinematic styles inspired by films.
- Step 4: Adjust Lighting and Color. Fine-tune brightness, contrast, shadows, and highlights.
- Step 5: Enhance Details. Use AI-powered tools to sharpen key areas, add depth-of-field, or emphasize textures.
- Step 6: Export High-Quality Image. Choose the appropriate resolution for social media, prints, or portfolios.
Tips for Achieving Realistic Cinematic Effects
Whether using Photoshop or AI, consider these tips:
- Always start with high-quality original images for better results.
- Focus on one cinematic style at a time to maintain consistency.
- Combine manual adjustments with AI tools for a unique touch.
- Experiment with color grading; small changes can dramatically alter mood.
- Use reference images from films to guide composition and lighting.
Common Mistakes to Avoid
Creating cinematic photos requires balance. Avoid these errors:
- Over-saturation or unnatural colors that reduce realism.
- Excessive blur that obscures important details.
- Ignoring lighting direction; mismatched shadows break the cinematic illusion.
- Using too many filters at once, which can make the image look artificial.
Combining Photoshop and AI Tools
For best results, consider combining methods:
- Start with an AI-generated cinematic effect to save time.
- Refine colors, lighting, and details in Photoshop for professional control.
- Apply finishing touches like grain, lens flares, or selective sharpening to enhance realism.
Practical Applications of Cinematic Photos
Transforming photos into cinematic style is not just for professional photographers:
- Social Media: Create visually striking posts and stories.
- Portfolio: Showcase your photography or design skills with cinematic quality.
- Marketing: Use cinematic images in ads, banners, or promotional content.
- Personal Projects: Turn family photos or travel shots into dramatic, movie-like visuals.
Conclusion
Transforming ordinary photos into cinematic masterpieces is a skill anyone can learn. By understanding cinematic principles, using Photoshop for fine control, leveraging AI tools for speed, and combining both approaches, you can achieve stunning, movie-like images. Experiment, practice, and refine your techniques, and soon your photos will tell stories that captivate and inspire.